Cooking with Laravel

Laravel Application Developer CookbookI’ve recently added a new Laravel 4 book Laravel Application Development Cookbook written by Terry Matula and available from PacktPub to my library.  I would consider myself a very good PHP developer, and have been searching for a framework to help me excel the development process.  I’ve tried a couple in the past (Yii, CodeIgniter) but always felt constrained, like if I wanted to do something it didn’t support ‘out of the box’ it was a headache and required a lot of hacking. Granted this could simply be my impression and not fact, but not having time to really sit down and figure out if this was reality, I just passed over them.  For the record, I do have 2 live apps using Yii, so I didn’t completely give up.  Back to Laravel.

At a conference in Buffalo NY, I sat in a session by Zac Vineyard and he talked about Laravel and it really piqued my interest.  The session was really about Composer and autoloading, but what he had said about Laravel impressed me and it sounded like something I really wanted to  learn and utilize.

To frame this properly, I would consider myself a Laravel beginner, because I still have to look up how to do things, I’m hardly proficient, and am always looking for tutorials, tips, tricks and other material to help me along my quest to achieve an equivalent level I am with “normal” PHP development.  I can’t wait until I can just sit down and let the Laravel code pour out of my brain.  With my obsession to learn this framework, this is now the 2nd book I’ve read about Laravel 4 and I definitely recommend it to anyone that wants to learn.

As you would expect by the name, this is a cookbook.  Tasks are broken down into recipes (think mini-tutorials) that help you cook up the functionality you’re looking for.  Since this is the 2nd book I’ve read, I came in with some (albeit limited) Laravel experience.  I actually performed the first set of chapters so I could solidify the basics in my brain.

The recipes are concise and all follow the same pattern : Getting Started, How To Do It, How It Works, There’s More, and finally sometimes a See Also section. Getting Started sections run through setup steps necessary for the recipe, sometimes building on other recipes, or are prerequisites for other recipes.  The How to do it is a concise tutorial with no fluff.  Numbered steps walk you through exactly what to do, sometimes with code and/or screenshots.  This is followed by a How it Works section that explains what each step does, written in a nice conversational way, almost as if Terry’s there helping you along.  If those weren’t enough, there is a There’s More section of the recipe that may explain some way to extend the recipe, take in another direction or explore an alternate method or change it in some way to really solidify the concept.  The See Also section typically points to related recipes, or recipes that could be cooked together to produce a more robust solution.

The book starts out like most do – obtaining and installing the software and progresses though how Laravel works, learning syntax along the way.  This book is not a Programming Guide to Laravel or a newbie guide for that matter.  Now before you take that the wrong way, a beginner can learn a lot with this book, and I would even recommend it to one.   What I mean is that it does not go step by step explaining how variables work, and ramble through chapters and chapters on language grammar, etc.  This book flat out teaches you how to build an application with blocks of functionality you can easily alter (if you have to) and drop into your projects.  Concepts from recipes can be easily extracted and used however you need them.  That said, if you need (or want) the specific Laravel grammar and methodology, probably the best place to get that is the actual Laravel Documentation.

If you learn and develop like I do (by example) then you have to add this book to your library.  It encompasses so many things you’d be building in your app its not worth the trouble to not have the book (did you follow that?)  I mean, if you need to add authentication to your apps, there is an entire chapter on that.  Along those lines, there is a chapter on Security and Sessions with some great recipes that help you understand the complexities of these types of things, including recipes for setting up a secure API server.  This chapter was gold to me, because I develop mobile apps with PHP services and this really shed a light on how to configure an API with keys and security, covering everything from database table creation through testing it in the end.

No matter what you’re developing with Laravel, I’m certain you’ll find useful bits in this book.  Its a great addition to my new (still small) Laravel library.

Go get it now!

Posted in PHP | Leave a comment

Goodbye Save Button

No Floppy Disk, slashed circle with blue 3.5" floppy diskI’ve always been amazed at web applications such as Asana, where in this case, you’re creating a project in a notepad fashion, not really viewing all the ugly squares on an underlying rigidly structured form.  You click, or press a shortcut key and you’re presented with a box in which to type, press enter, and that one magically goes away and another appears, leaving your text in its place.  Clicking intuitively somewhere else reveals a text area for a longer description, or clicking the sub-tasks icon, presents you with a fill-as-you go checklist.

Its nothing short of brilliant, and the best thing – there is no SAVE button.

I want this functionality for some longer forms I’m working on, think college undergrad and graduate applications.

Currently, you have to click save to save whatever you’ve entered and that feels sloppy, yes, its typical and expected, but I’d like something better and different, I like my apps to stand out. Plus, some of these pages have a lot of fields (for a reason) and if anything happens to your connection, the browser or your session, you’ll lose  that data.  If that happens, even if its not your application / server’s fault, you still leave a bad taste in the user’s mouth, and they may not be willing to fill it out again.

I set out on what I figured would be an R&D quest to figure this out, it ended up taking me less than 30 minutes to get a proof of concept working using my favorite interactive framework,  jQuery, and that included creating a MySQL database to save data to 🙂  I used plain old jQuery – if you can call it that.  I didn’t add in any extensions of modules to give me this ability.

Looking at my solution, it is so incredibly simple, its almost stupid.  I liken it to figuring out a magic trick, and thinking, really that’s all there is to it?  That impressed me?  I’m sure there are many other ways to do this, possibly even better, there might even be a module or extension available, but this is how I went about it.

I created a form with both a hidden and an input field that looked like this :

<input type='hidden' id='r_id' value='' />
<input type="text" class='blursave' placeholder="Type something…" 
  id='field_label' d_name='field_label' d_mod='z_test' />


The r_id field will hold the database record’s primary key (if we’re editing a record), and will be empty if this is a new / first time view.

The real key here is the blursave class – this can be called anything, I made that up, the name is arbitrary, but having a unique class name assigned to your fields is very important.  I’m also using Bootstrap which is not required to do this and is completely optional. I used it because I like my stuff to look nice even when I’m just “playing around”, so you’ll notice the placeholder attribute here as well, if you’re not using bootstrap – you can remove this.

Of almost equal importance is the d_name, and d_mod attributes.  The d_name is the field_name in the database where this value needs to be… or came from.  With my prototype (I don’t necessarily recommend this for production) I also added d_mod – the table this value belongs to.  For obvious reasons you don’t want to expose this to the world.  You could easily encrypt these values to make them a little less hackable, and I will do that when this ends up in production, but for my prototype, I didn’t want to spend the time doing that.  Having the table name with the data element makes is easier for a complex form that may be joined in the database schema.  You could add other attributes if you wanted to keep track of the record’s foreign key.  You could also combine all of these important bits into one field, encrypt it and just send one bit of data, decrypt and process it on the server.  Maybe my next post will have all that in there, we’ll see.

Continuing on,  the data we have represented in our field’s attributes consist of :

  • primary key of the record (or not)
  • database field name
  • database table name
  • the value going into the database

Here’s where the magic comes in.  Using jQuery, I can add a blur action to the .blursave class, so anytime someone blurs (moves focus) off of a field, this function is called.  It’ll look a lot like this –

$('.blursave').blur(function() {
});

So now what?  When this gets called because someone moved away from our field, we need to get those bits of information, then assemble arguments to post to a page that will save that information for us.  We’ll use the traditional div selector (#) as well as the .attr() method to grab our custom attributes like this –

$('.blursave').blur(function() {
   var r_id = $('#r_id').val();
   var d_val = $(this).val();
   var d_name = $(this).attr('d_name');
   var d_eid = $(this).attr('d_eid');
   var d_mod = $(this).attr('d_mod');
  $.post( "update.php", { r_id:r_id, d_val:d_val, d_name:d_name, d_mod:d_mod })
     .done(function( data ) {
         obj = JSON.parse(data);
         console.log( obj.sql);
         console.log( obj.rid);
         var rid = obj.rid;
         $('#r_id').val(rid);
     });
 });

You can see that I’ve accessed the record id (r_id) directly.  If this is a new form, this is empty.  If someone were coming back to edit data, this would have a value set (more on that in a second).  I then get the value typed into our field – .val() , and then use the attribute selector to snag the various other bits of data we’ll need to make our database call.

Once I have that data, I use the .post method to send this data to my update.php page.  The parameter section may look confusing, but those are key:value pairs, I just happened to name my keys the same as my variables.  This is probably bad practice, but whatever, its a prototype.

Over to update.php

In our update.php script, I set my php variables (again not a best practice, you’ll want to strip bad characters, and prevent hacking, yada, yada, yada)

$rid = $_POST['r_id'];               # record id to update (if exists)
 $dval = $_POST['d_val'];            # value to insert/update
 $dname = $_POST['d_name'];          # database field name to update
 $dmod = $_POST['d_mod'];            # tablename to update

I need to determine if this is a new record, meaning its the first data point entered on the form, in which case I need to run an insert, or if this is the 2nd+ data point, which then requires an update.  In the first situation – $rid would be empty, right?  Yep –

if (empty($rid)) {
   $sql = "insert into " . $dmod . "(".$dname.") VALUES ('".$dval."')";
   $res = $db->query($sql);
   $rid = $db->insert_id;
} else {
   $sql = "update " . $dmod . " set " . $dname . " = '" . $dval . "' where id = " . $rid;
   $res = $db->query($sql);
}

Agreed, this is not the best way to deal with checking $rid, but will work for us now.  If that is empty – which it would be on the first field used on the form, we’ll construct an insert statement, execute the query, and get the incremented primary key ($db->insert_id).  If it is not empty, we know which record to update, and we’ll construct an update statement as above and execute that.

SIDENOTE: depending on the database you’re using, you could probably use REPLACE INTO or UPSERT or whatever your database may support.  This method is guaranteed to work for any database that supports insert and update 🙂

After one of the above statements executes we have an $rid set, whether its the original we came to the party with, or one we picked up with our insert.

Again, since this was a prototype (no flames please), I wanted to see what the database was doing, so I included the SQL statement  in my return JSON string <G>.   I set up an array, and then json_encoded it to return back to my jQuery on my form page

$return_array = array ('sql'=>$sql,'rid'=>$rid);
print json_encode($return_array);


To the Form Code Batman

In our .post we have a status called .done – that executes … well… after the post is done, makes sense. The json string we created in our PHP file is returned to us and a callback function is executed, and the response (our json string) is stored in a javascript variable called data (you can name this anything), and it looks like this :

{"sql":"insert into z_test(field_name) VALUES ('this')","rid":175}

in order to use the json data, we need to parse it

obj = JSON.parse(data);

now we can access the elements of the data like this :  obj.sql  and obj.rid

I log these to the console so I can see what it going on (again for production, or on a live server even for testing,  you probably wouldn’t send the SQL statement, and wouldn’t log to the console).  Since this is running on my laptop, I don’t care.

console.log(obj.sql);
console.log(obj.rid);

then I set a javascript variable called rid to the record id we just touched in update.php (“rid” from the json string), and update the hidden r_id on our form.

var rid = obj.rid;
 $('#r_id').val(rid);

If this were a new form, next time a field is blurred, we have the record id of the first inserted record in our database and our update.php file will update and that data will be added to that record.  If we’re already editing a record, and this r_id was set before our update.php was run, eh, the code updates #r_id value anyway.  If you wanted you could check to see if its empty first then updated it, its up to you.

So there you have it, it took me longer to write this up than to actually build this save-on-blur prototype.

Quickly thinking about it, you’ll need some other code to deal with radio and checkboxes, but its still the same concept.

If anyone has a better way to do this please share, I’d love to hear about it.


Posted in jQuery, PHP | Leave a comment

PHP and Word’s special characters

Sick of users copying and pasting Word content into your web forms?  We all know you end up with all their special characters ending up as ? in your text.  This recently happened to me and I had to fix it, see these were college essays on the undergraduate application.

This is what I used to convert them to html friendly characters :

function convert_raw_utf8_smart_quotes($string)
{
    $search = array(chr(0xe2) . chr(0x80) . chr(0x98),
	chr(0xe2) . chr(0x80) . chr(0x99),
	chr(0xe2) . chr(0x80) . chr(0x9c),
	chr(0xe2) . chr(0x80) . chr(0x9d),
	chr(0xe2) . chr(0x80) . chr(0x93),
	chr(0xe2) . chr(0x80) . chr(0x94));

    $replace = array('&lsquo;',
	'&rsquo;',
	'&ldquo;',
	'&rdquo;',
	'&ndash;',
	'&mdash;');
    return str_replace($search, $replace, $string);
}


This worked great until I had to pump out a PDF file for admissions using this content, and the above & codes don’t look so pretty. So I played a little music chairs with the code and ended up calling this when I had to display the code in the PDF file –

function convert_smart_quotes_for_PDF ($string) 
{ 
    #this reverses the process for the PDF rendering
    $search = array('&lsquo;',
	'&rsquo;',
	'&ldquo;',
	'&rdquo;',
	'&ndash;',
	'&mdash;');

    $replace= array("'", 
      "'", 
      '"', 
      '"',
      '-',
      '-'); 

    return str_replace($search, $replace, $string); 
}


Enjoy

Posted in PHP | Leave a comment

Best Mobile Development Tool … EVER

testflightlogoI read about this gem called TestFlight (http://www.testflightapp.com) earlier this year, and never really gave it much thought.  I’m pretty busy and a ‘lone wolf’ developer, so typically send out screenshots during development to the client and sometimes do a face-to-face demo.  Recently, more people here at the college wanted to proof and test the app before it was submitted, so we all gathered in a conference room, and I projected the iPhone Simulator on the big screen and gave a demo to the group.

After that meeting, I had one of the designers come to my office, hooked up her iPhone to my laptop, and went through the process of setting it up as a development phone with a provisioning profile and all that goodness.  If you’ve done this you know its a bit of a pain even for just your own phone.  Once it was set up, I deployed the app to her phone and sent her on her way.

I received an email a few days later with changes and new features.  I made them (took about 3 weeks), she came back up – and in the span of those three weeks – she had a phone issue and had to restore, essentially wiped out the setup I had done.  I don’t remember why, but the repeated setup didn’t work, or we didn’t have time to set it up again, so she used my phone to test the app.  The app finally was approved by the college, submitted to Apple, and released to the app store.

A couple bugs were discovered after it was launched, and I fixed them. Not wanting to have to have a meeting, demo or deploy the app again to other phones, but wanting them to view the changes I made, I remembered TestFlight and figured I’d give it a whirl.  I know the headache involved when manually setting up and deploying and app, so I buckled up ready to generate certificates, profiles, and playing with the developer portal at Apple.

I was completely amazed at how easy it was to create an account, set up a team, invite testers, and upload and install the app.  I had it installed on the designer’s phone within an hour of creating the account, and alot of that time was compiling, building and uploading the app.  Once your team mate(s) add their device, you’ll get an email with a “device-export.txt” file.

  • Save this file to  your desktop
  • Access Apple’s Portal and click Devices | All | click the + sign at the top to add a new device
  • Upload this file

You’ll now see your teammate’s device listed (just a quick note – you can set up 100 devices total – Apple’s limit).

Now you need to update TestFlight with the new devices via the provisioning profile. To do that –

  • click Development under Provisioning Profiles
  • download a new provisioning profile.
  • Back in TestFlight (after you’ve uploaded your app) – go to Apps
  • click your app name
  • click a version of your app
  • then permissions on the left
  • upload that new profile you downloaded from your portal

Now that the new profile is uploaded, you’ll see the new people you’ve added listed in TestFlight with empty checkboxes.  Check them off, and click Notify via email – and they’ll get an email with a button to install the new profile and a button to install the app.  That’s sounds confusing, but its pretty straightforward and makes sense once you’ve done it.

Getting your App Uploaded to TestFlight

One thing I didn’t know was how to create an .ipa file (which you can read about here btw – ( http://help.testflightapp.com/customer/portal/articles/494413-how-to-create-an-ipa-xcode-4-3- ) once you have an .ipa file, you can drag it to this TestFlight desktop app, and it’ll upload it for you.  Alternatively you can log into your TestFlight account, and upload it old school.

HOWEVER, you don’t have to do all of that if you install the desktop app ( https://testflightapp.com/desktop ) which is in beta, but freaking brilliant !

Screen Shot 2013-08-15 at 2.36.32 PM
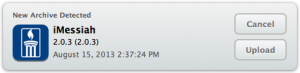
It watches Xcode for new Archive builds and will ask if you want to Upload the new build to your TestFlight Account (be aware TestFlight must be running for this to happen).  If you miss that growl-like pop-up which goes away after a minute-ish, you can simply click the pilot icon in your status bar, and choose an archive.  TestFlight takes over, converts your archive to an .ipa and uploads it for you, which is fantastic and one less thing I had to do!

While it uploads, it’ll ask you for release notes, so you can list all the bugs, fixes and features you have added for this version, and when its complete you can choose what members (or all) on your team you want to notify of the new version.  These team members will get an email they can open on their device and immediately install the new app.

This saves so much time and hassle, and gives your client and/or app testers ‘beta’ access to your app – hassle free, which is the most important part.  Today alone its saved me a few hours because I’ve pushed 2 versions, and added multiple people to the team.  If you have questions about what it can do, if its free, how it works, etc check out their FAQ  (TestFLight is free btw)

I can’t tell you how awesome this is, you have to try it yourself.

-Jon

Posted in Uncategorized | Leave a comment

iMessiah version 2.0 … waiting

iMessiah app icon

I’ve just completed a very long overhaul of the Messiah College iOS app – iMessiah. Overhaul as in complete ground up rewrite with a new graphic design, and am now starting the Android tweaks to get it to function and render 100% correctly on Android.

This app is directed at prospective students, with information, directories, maps, etc. With the release of the 1.x version a few years ago, many factors came into play with the 100% rewrite.  The first being the framework I used.  Version 1 used Rhomobile – a framework that uses the Ruby language to build a mobile app.  The app was sluggish, and felt like a badly written mobile web app.  There was no way to get it to work properly on Android, and the factors that drove us toward Rhomobile at the college have faded away almost as fast as they arrived.  Basically the app needed to be reconstructed to be fast, interactive, updatable and better looking overall, some of the screens were as ugly as they were slow.

Enter Titanium.

Appcelerator’s Titanium was the framework of choice for this build, and I have an intense love/hate relationship with it.  The hate part comes mostly from my ‘still-green’ knowledge, so sometimes it feels hard to craft what I want to do, but when I figure it out, I’m very happy with its performance.  Granted – this app isn’t your run of the mill multi-screen-hardcoded-brochureware you’d find from other colleges.  This is essentially a mobile-decentralized-controlled app that is unbelievably fast compared to its prior version and what its doing, and amazingly flexible when you get right down to it.

Here at Messiah we have Jadu, a content management system.  I’ve used Jadu APIs to pull data from that system into the app, save it for later use, and check occasionally for updates.  What this means, is that our PR and Marketing folks can make changes to certain areas of the CMS and content will update on the device.  Multiple feeds are live – such as news, events, and the sports scores (if there’s a game going on).  Live directories are pulled from our servers and updated as necessary so the device holder’s information is always current.

So its all but ready to go to the App Store … however, as of right now (July 23) Apple has posted this :

We’ll be back soon.

Last Thursday, an intruder attempted to secure personal information of our registered developers from our developer website. Sensitive personal information was encrypted and cannot be accessed, however, we have not been able to rule out the possibility that some developers’ names, mailing addresses, and/or email addresses may have been accessed. In the spirit of transparency, we want to inform you of the issue. We took the site down immediately on Thursday and have been working around the clock since then.

In order to prevent a security threat like this from happening again, we’re completely overhauling our developer systems, updating our server software, and rebuilding our entire database. We apologize for the significant inconvenience that our downtime has caused you and we expect to have the developer website up again soon.

If your program membership was set to expire during this period, it has been extended and your app will remain on the App Store. If you have any other concerns about your account, please contact us.

Thank you for your patience.

So now I wait. The good thing is – no one is waiting for me. Have a look at the gallery below to look over what I’ve put together.

But before that, I want to give credit where credit is due and thank the following people :

  • Project Manager : Ramona Fritschi : she kept me moving on the project and interfaced between the others on her team, reigned in requests, and nagged me for status updates. Without her in the mix I’d be taking direction from multiple people, trying to arrange meetings, request images and boil down the flow of functional requests.  She was also my app tester and sounding board when I had some crazy new idea for something.
  • Designer : Ben Bond : his graphic design and creativity is apparent in the new look of the app, a fresh, clean design which was well needed. It makes you want to click around and check out the app.  From a programmer’s standpoint, I think its beautifully crafted, each element is there for a reason, not just tossed in to make it look cool
  • Art Direction : Nancy Soulliard : she made sure we stayed in the bounds of Messiah’s guidelines, coloring inside the lines if you will.  She consulted on various screen layouts and more importantly “blessed” all the artwork before it was sent to me, so I didn’t have to second guess if we could use an image or graphic element.
  • Programmer :  Me : I tirelessly fought and won every battle with each bug or problem I created.  I kept my head (mostly) as new functionality creeped in at every turn or I decided to try some new way to achieve a faster render and it wouldn’t work the first 10 times. I became intimately involved with Appcelerator’s documentation and message boards, and made some new developer friends on twitter which is always a plus.
  • Pure Javascript Picture Gallery : Frédéric Maquin’ : this library was a lifesaver, the gallery was a last minute addition and this saved me from having to code it up from scratch.  Granted it posed its own insanely frustrating issues as I heavily customized and hacked it apart it for our purposes, but overall – very thankful to Frédéric Maquin for providing this to the community.
Posted in Appcelerator | Leave a comment

Peter and the Computer Fair

masteringcoronasdklogo

** UPDATE **
Peter won 1st place in the regional computer fair.  Now he moves on to compete at the State level in May


My son Peter has been working on a mobile app for computer fair.  He’s 15, was not a programmer, and the “challenge” was to create an educational game for K-12, or any group in that range.  He had seen me working on a game tutorial class hosted on masteringCoronaSDK.com – a fantastic site, with great tutorials if you want to learn.  He took Jay’s Froggie Went a Hoppin’ game (the game you build as you go through the video series) and put a twist to it.

In Jay Whye’s game, you play a frog, and on each level you move your frog through the pond, from start to finish, hopping on as many lilly pads as possible. Each lilly pad you hop on disappears so you can not go back, or retrace your hops.  Once at the end, you lose 5 points for each pad you left in the pond.  In the higher levels, a snake slithers through, and will kill you if it touches you.  Also, if you take a path that leads to a dead end (since you can’t go back) you die.  Very addicting game actually, and a great way to learn how to code in Corona.

His video series, Beginning Mobile Game Development, starts with a Lua boot camp, which goes through the basics and some more advanced topics of the Lua language, and then walks the student through each step to build out the game.

Screen Shot 2013-03-07 at 9.00.32 AM

Professor Hopalong’s Math Adventure Title Screen

Peter wanted to build a math game for little kids, and decided to use Jay’s game framework as a basis, and change it up a bit.  In Peter’s game, your a bunny.  Each level presents a math problem (ie level 1 is 1+1=?).  The board is a path of carrots that lead to 3 different rabbit holes.  One hole contains the correct answer to the math problem.  You eat as many carrots as you can to get to the correct answer, and when you do, you win the level.  If you hop to the wrong answer (rabbit hole), you die (nice right?).

Peter changed all the graphics so your main character is now Professor Hopalong.  Since you’re a rabbit, you hop through a garden, eating a path of carrots, hopping to one of three rabbit holes.  The title sequence displays Professor Hopalong, in front of a bunch of carrots, with the default play, options, and credits buttons from Jay’s game.  All the graphics are either from Vicki Wenderlich, or from free use graphics, clip art and sound track sites.  Here’s a screen shot of level 2 –

Level 2 - Professor Hopalong's Math Adventures

Level 2 Screen shot with carrot path and 3 rabbit holes.

There are still a few little things he’d like to change, for example – right now each level is a static math problem.  So level 1 is always 1+1.  He wants to give each level a range of numbers to include in the math problem, and randomly choose those numbers.  So maybe level 1 contains a low and high of 1 and 2 – so that math problem could be 1+1, 1+2, or 2+1.  Level 2 might be 1 and 3 and so on.  Level 5 might start getting harder and be 2 and 6, so the number 1 is not in any of the math problems now.  As you go to higher levels, the problems get harder.  Starting at level 10, 20, 30 – he wants to change up and introduce subtraction, multiplication and division respectively, and each of these first levels with the new operators will start with lower numbered problems.

Its pretty neat, and I’m proud of what he’s done, however, it’ll never be published to the app store, its strictly going to just be a simulator demo for the fair.  I can’t afford to purchase a license for this, and I think since its based on Jay’s tutorial code, we’d have to work out a deal or something, not sure.  For the purposes of him learning to code, getting excited about programming, and the improvements I’ve seen in his ability to debug things (like a real programmer), I think it was worth the time.  Plus I got to spend time with my son helping him learn something I love.

The fair is March 25th, we’ll see how he does.

Posted in Corona SDK | 1 Comment

MAMP – update phpMyAdmin

phpMyAdmin LogoI have an older version of MAMP installed on my MacBookPro.  I have a couple hosting accounts and they both have a current version of phpMyAdmin installed.  The later versions allow click-to-edit-in-row data changes on the browse or search results screens.  My local install does not, and it was getting annoying.

I tried something and it worked, which in hind sight seems pretty obvious, but figured I’d share it anyway.

Download a new version of phpMyAdmin

decompress it and leave the folder name as is for now (for me it was phpMyAdmin-3.5.6-english)

copy the directory and head over to your MAMP install to the bin directory

On my Mac, this is /Applications/MAMP/bin/

paste the new phpMyAdmin code tree into the bin directory

rename the current phpMyAdmin directory (conveniently named phpMyAdmin on my machine) to something like orig_phpMyAdmin

rename your new version (phpMyAdmin-3.5.6-english) to phpMyAdmin

enter the orig_phpMyAdmin directory and copy config.inc.php into the new directory.

That’s it.


Posted in Uncategorized | Leave a comment

Securing document pages in Jadu with phpCAS

I’ll skip the background, but what this post explains is how I secure individual document pages using phpCAS within a Jadu galaxy site.

If you want the quick overview – you can watch the video here –

If you want the details on how I did this, keep reading.

** DISCLAIMER **

Doing this could make upgrades difficult, so you’re on your own if you do this.

Out of the box, you can password protect a document page, and that’s great if you have a way to disseminate that password securely.  We already have CAS setup here and have many CAS enabled applications, so what better way to secure something than use what we have in place.

Jadu Advanced Meta Tags

The idea here is to allow a non-technical user to be able to secure a document page (ie a policy or other non-public information) without having to contact the CMS admin, or worse, the network admin.  Jadu has a number of Advanced Metadata tags that can be used for this purpose (screenshot to the right).  If you take a look, you can see there are many to choose from.  Source, Status and Coverage seem to be two good possible candidates, so I choose Status, and allow any document page to be publicly displayed, unless it has the word ‘secure’ in the Source tag of the Advanced Metadata screen.

How do I make that happen?

The first thing I did was install (and configure) phpCAS on the Jadu server.  Since we had this installed already on one of our other php servers, I simply copied the CAS.php and CAS directory to the Jadu server and placed it in /home/jadu/jadu/custom/  <– this is the custom directory where all the class files are (in a 1.12 install it will be /var/www/jadu/jadu/custom)

Here is the notation I’ll use below so you can follow along:

GALAXY_HOME : /home/jadu/microsites (this is the parent home for all galaxy sites)

HOME_19 : GALAXY_HOME/ms_jadu_19  (this is the home directory for the site we’re securing)

Once those files were in place, I determined which folder controlled my galaxy site and actually the files that control the galaxy site are located in HOME_19/public_html/site/scripts.  Once I was there I noticed they’re all dummy files that require the “real” files back in /GALAXY_HOME/public_html/sites/scripts

To customize a galaxy site, you have to copy whatever files you need to from /GALAXY_HOME/public_html/sites/scripts to HOME_19/public_html/site/scripts

** DISCLAIMER **

Doing this could make upgrades difficult, so you’re on your own if you do this.

I copied 1 file : …/scripts/documents_info.php  This file controls the display of a document page. I knew I needed to access the advanced metadata for the document.  It is obviously being displayed on the page, because its there when I view source.  However, the function that is getting called, isn’t setting those tag variables, it actually prints that block of html code, so I couldn’t just reference the STATUS tag in documents_info.php.

I knew I had to pop to the CAS login at the top of the page, not half way down after the page started rendering, so I copied a line of code out of JaduMetadata.php and placed it near the top right under that include_once line –

include_once("JaduMetadata.php");
// NEW SECURE CAS CHECK USING METADATA->COVERAGE
 list($metadata, $taxonomyString, $mappingString, $bespokeString) = getAllMetadata(DOCUMENTS_METADATA_TABLE, DOCUMENTS_CATEGORIES_TABLE, $_GET['documentID']);

What this line does is set up a $metadata variable that I can access from documents_info.php

So I then check that status with this –

if ($metadata->status == "secure") {

Then if it matches I include all of my CAS code –

require_once('custom/CAS.php');
 phpCAS::client(CAS_VERSION_2_0, 'sso.messiah.edu', 443, '/cas/',false);
 phpCAS::setNoCasServerValidation();
 phpCAS::handleLogoutRequests(false);
 phpCAS::forceAuthentication();
 $logout_url = "https://sso.messiah.edu/cas/logout";
 $_SERVER['REMOTE_USER'] = strtolower(phpCAS::getUser());
 }
 // ------ END SECURE PAGE CHECK ------


With CAS, the userid is stored and I wanted to display that on the page, so further down the page in teh breadcrumb area I placed this –

<?php if ($_SERVER['REMOTE_USER']) {
         print "Hi " . strtoUpper($_SERVER['REMOTE_USER']) . " ";
      }
?>

That’s it.

Posted in Jadu Development | Leave a comment

TiWeather – app coolness

I had to display the weather – specifically a 5-day forecast – in an app I’m working on here at the college.  Instead of rolling my own, I went looking to see if anyone had already done this.  The only code I found for Titanium was  GWeather (by Bob Sims).  This uses Google weather, however, Google has recently pulled their weather API for developers, which essentially means, I’m going to have to roll my own.  I was on a quest for another weather service and looked at many different APIs that were available.  I settled on Yahoo Weather, they have a json feed, and its super simple, just swap in the zipcode in the url and you have your feed.  Granted its not as robust as Google’s once was, but all I really wanted was a 5 day forecast and this had it.

I figured from the outset that I would build a tutorial around this (eventually) and especially share the code, so I commented like crazy as I went. That also meant that I would have to build a self contained app that pulled and displayed the weather.  I also wanted to implement whatever I came up with into the app for the college easily  (remember the original purpose for this?), so that’s what I did.

TiWeather is a full working app (on iOS, haven’t debugged pull to refresh for Android yet – initial app works fine), and it had a hard coded zipcode (changeable in app.js, or pass it in from elsewhere in your own app).  Using that, it hits Yahoo’s API and pulls back the current conditions and 5-day forecast in nicely structured JSON.  While JSON is simple to parse in Titanium – JSON.parse(this.responseText) – I had a good ‘ol time splitting up the individual data elements the way I wanted (see details of this in FirstView.js around line 55) when I render them to the screen. Anyway, after the JSON is parsed, I save the data in a table on the device for caching purposes which also double for offline usage.  I also keep track of the last time weather was fetched, so if you close and open the app or navigate around to other fictional areas of the app, it won’t go pull it again right away.  This time limit is currently 900 seconds (15 minutes) and also configurable from within app.js.

Included Features / Cool Stuff?

Since I knew other developers would be looking and critiquing my code, I figured I could throw out some cool features to distract them from comparing my code to theirs.

  1. Since the weather feed didn’t change all that often while I was testing code, it was near impossible to tell if the refresh function was actually working, other than a small timestamp in the feed itself.  So I have some code in the app that alternates between 2 zipcodes each time you refresh.  Obviously you wouldn’t have this in your app, but I needed a way to prove it was doing what I was expecting.  I alternate between 17019 -Dillsburg, PA where I live and 14424 – Canandaigua, NY – where I grew up.  I figured the weather in those two locations were different enough you can see the screens change. This block of code is located in FirstView.js around line 300.
  2. I think the refresh circle arrow icons are a thing of the past, so I’ve implemented ‘Pull To Refresh’ which is what most apps do now anyway. I have some logging that happens, so if you have Titanium Studio visible when you run the app, you can see it working when you refresh. After a second or two the display updates, in this case, the weather for the alternate zipcode displays.

What do I hope you get out of it?

I hope this code can be of use, whether in whole – to actually pull a weather feed, or as an academic example on how to fetch some JSON from a server somewhere. The major bits of functionality you can hack out are –

  • storing a variable in the device properties
  • display a spinner and message while loading data
  • pulling and parsing a JSON feed
  • saving data to a local database
  • pulling data from a database
  • some interesting use of .split  to pull apart data elements 😉
  • table row construction with various pieces per row
  • implementation of pull to refresh (which totally kicks-ass) including a hidden pull message and rotating arrow
  • refresh a tableView with completely new data
  • a good laugh at some probably really stupid things I did

Other tid bits of note

This was built with the Single Window Titianium Studio template, so the display code is located in /ui/common/FirstView.js  Also in that common directory is my first ‘fetch-every-time-the-page-loads-version’ (json_parse_FirstView.js), as well as the save-to-database version before I had the pull to refresh (json_pulled_from_database_FirstView.js).  Both are documented and I left them there so hopefully they’ll be use to someone, and so you can hack up the code easily.

The meat and potatoes (or salad of you’re a vegetarian) is contained in getWeather.js located in the root of Resources.   Here you’ll see the code that checks to see if an update is needed, pulls and parses the feed, saves it to the database, yada, yada, yada.

Feel free to send me comments, questions and any changes you think would make it rock.  Its not AppStore bound, however, it can still be a cool demo app… my personal kitchen sink.

Grab it from GitHub | Watch it on Vimeo


Posted in Appcelerator | 1 Comment

CoronaGeek and Development

I like to play with mobile stuff…

That said, I’m making my rounds with mobile development frameworks.  I’ve published apps with both Rhomobile and Titanium.  I was turned on to Corona SDK about 5 months ago by a friend that was building a game.  I downloaded it and started a tutorial I found and since then, I can’t get enough.  I think I’ve downloaded or looked at every tutorial I can find.  There are so many resources available and a fantastic community.  One of the resources I really enjoy is Corona Geek.  This weekly video cast / google hangout is fantastic.  They’ve recently released the audio portion of the weekly show on iTunes, Stitcher or if you use Chrome, you can install a Chrome Extension – I’m loving the audio podcast option now, because I can download it and listen in the car or if I’m splitting wood or something.

Why is it such a good show?

Corona Geek

The guys. Charles McKeever – ok that link didn’t go to a page about Charles, just listed his uploads on CoronaGeek.com, which is pretty much everything on the site, this link does though :).  Anyway, he’s great.  He has great insight, seems quite connected and asks the questions I want to know about.  His two co-hosts (sorry guys, I think that’s what you are) Brian Burton is the author of a few Corona books that come highly recommended. I’m hoping Santa [wife, cough, cough] brings me one for Christmas.  The other co-host is Toff Ward all around developer, who really likes Corona and is pretty funny. These three guys know their stuff and really enjoy getting together to talk about mobile development.  They’re not just there to read the release notes, and digest the news, its like hanging out in the break-room with some geek friends and talking about mobile development.  So if you want to know what is going on with the latest version, hear reviews of resources and tools you can use to build apps, or just want to keep in touch with the community, this show is a must. I pretty much stalk them on Google+, Facebook, YouTube and Twitter.

Recently (last couple months I think) they’ve started to have guests on the show, which makes it really interesting.  Typically these guests are app developers of newly released Corona apps or service providers and they talk about how they built an app or how what they do supports the Corona community.  More proof the overall world of Corona is amazing. I like how fast CoronaGeek.com has grown, and how connected they’ve become. You can’t argue they’ve had some great interviews and  guests on the show. I only wish I lived closer so I could hang with these guys.

So what am I doing with Corona?

I’ve started working on an app for a friend using Corona SDK. Yea, I know, most of us fall prey to that Bad-Idea-By-Friend-Syndrome, but this time he actually had a good one, and I’m running with it. 🙂 I thought I’d use it as an opportunity to learn Corona. I’m hardly fluent, and still have to look up too many things right now, but I’m learning the SDK, playing with sprites and physics, its pretty easy to understand, and I really like the Lua language.

Which one is best?

Even though Corona is coming out with widgets to build more mobile app-ish UI screens, people still think of Corona as a game development SDK. I think its strong point is indeed graphic apps, which sometimes equate in many people’s minds to game type apps.  Corona handles animation, sprites, physics, scrolling and everything you would expect from a ‘game’ development environment.  It can build ‘normal’ app UI screens but that isn’t really its strong point, or at least, its not marketed as such right now.

I’ve built and published 2 apps (2 different ones for both iOS and Android) using Titanium.  These are functional ‘business’ apps and Titanium excels at these types of apps. Currently it is difficult to build a game with animation, sprites, etc with Titanium.  They do have a partnership with Lanica who is developing a game engine, which should be interesting because I think the founder of Lanica started Corona (insert mystery-intrigue-music here).

So right now, my unofficial preferences are to develop in both.  I’m not deep enough into Corona to make a clear decision yet.  I imagine if I could build a business app in Corona, I may jump the fence for good, although its hard to turn my back on all the Titanium knowledge I have.  I do know that the cheap-developer in me likes Titanium because its free (for now), and the $349 for Corona is a bit steep, especially when I’m releasing free apps.  Maybe I’ll roll that price into the cost of development for my next client. Plus there’s the great Corona community…

Until then – keep coding with whatever is easiest for you.


Posted in Corona SDK | 2 Comments